서론
현재 운영 중인 서비스는 같은 데이터베이스를 공유하는 5개의 프로젝트가 존재하는데, 모두 Spring or Spring boot + JPA를 사용하는 프로젝트들이다.
이 때문에, 한 프로젝트에서 도메인(Entity) 클래스에 변수를 추가한 경우에 다른 모든 프로젝트에서도 동일하게 추가 해주지 않으면 데이터베이스 조회 시 등 에러가 발생 할 수 밖에 없는데 이런 copy & paste 반복 작업을 개발자가 손수 하다보면 휴먼에러가 발생할 수 밖에 없음은 물론 같은 데이터베이스를 사용하는 Entity 임에도 불구하고 코드가 모두 다른 이상한 상황이 발생 할 수 밖에 없는 구조였다.
그렇기에 어떻게 할까 고민하던 중 멀티모듈 설계 이야기 with Spring, Gradle 이라는 글을 보고 필자의 서비스에도 단일 프로젝트 멀티모듈 구조로 가져갈 까 하다, 각각의 프로젝트마자 깃을 따로 관리하는게 서비스에는 맞다는 생각이 들어 멀티 프로젝트에 Nexus maven 저장소를 이용해서 도메인 클래스들을 분리 시키기로 했다.
본론
현재 시스템의 구조

이 처럼 여러 개의 프로젝트가 하나의 데이터베이스를 공유하는 구조로, 같은 데이터베이스 이므로 동일한 내용의 도메인 클래스가 각자 프로젝트에 각각 중복으로 존재하기 때문에 관리가 힘든 상황이다.
때문에 도메인 클래슬들만 모아놓은 새로운 프로젝트를 생성하고, 그 프로젝트를 jar파일로 만들어 라이브러리화 한 후, 내부 Maven 저장소인 Nexus에 업로드해서 다른 프로젝트들에서 dependency에 추가해서 시스템적으로 정합성을 유지하면서 사용 할 수 있게 하려고 한다.
간단하게 정리하면
- Nexus에 모듈화된 도메인 프로젝트 업로드
- 다른 프로젝트들에서 라이브러리화 된 도메인 프로젝트를 dependency 추가하여 사용
하는 것이 이번 글의 목표이다.
이 포스트에 Nexus를 설치하는 내용까지 담으려고 하니 내용이 너무 길어질 것 같아 nexus는 이미 설치되어 있다고 가정한다.
1. Nexus 설정
다른 분들의 글들을 보고 nexus를 무사히 설치하고 실행하면 아래와 같은 화면을 볼 수 있을 것이다.

그 후 Sign in 버튼을 클릭하면 초기 아이디와 비밀번호가 저장된 파일의 위치를 알려준다.

1 | cat /설치경로/nexus3/admin.password |

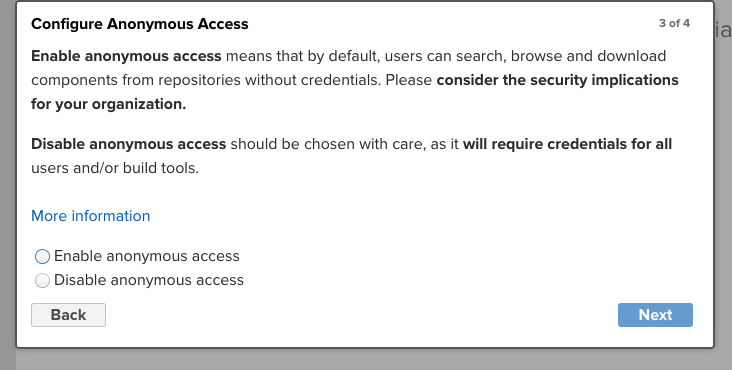
- 설정 하다보면 아래처럼 익명 사용자도 접근하게 할 것인지 물어보는데 당연히도 수정 할 수 있으므로 적당히 선택해주면 된다.
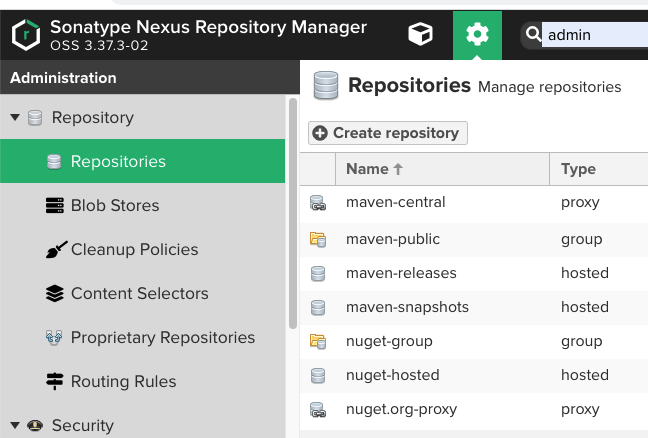
2. Repository 생성
우선 모듈화한 도메인 프로젝트를 업로드 할 레파지토리부터 생성해야한다.
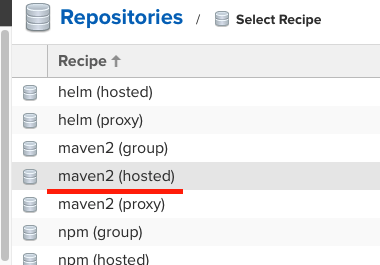
레파지토리 type은 group, hosted, proxy가 있지만, 우리는 위 처럼 maven2의 hosted로 생성한다.
- 이때 hosted는 레파지토리 관리자가 직접 호스팅하는 레파지토리 type이고,
- 다른 것들과의 차이점은 여기서 확인 해 볼 수 있다.
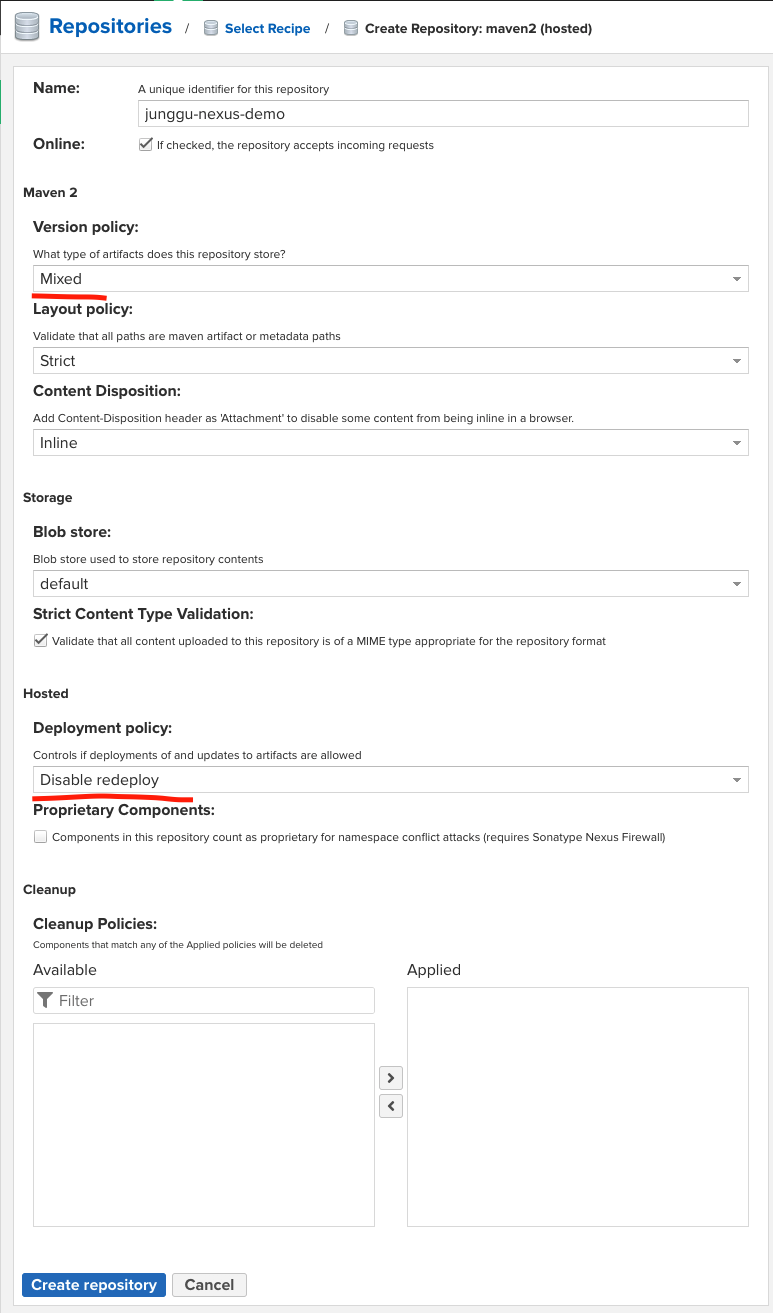
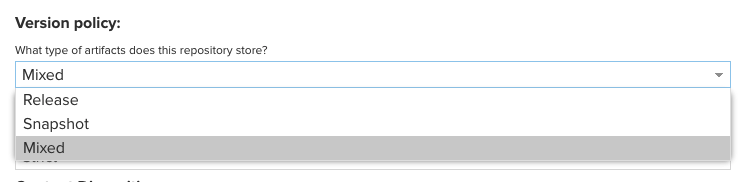
Version policy는
- Release
- Snapshot
- Mixed
3 가지가 존재하는데, 보통 Snapshot 레파지토리, Release 레파지토리를 따로 만들어 관리해야하지만, 필자는 Mixed로 지정하고 사용하였다.

Deployment policy는
- Allow redeploy
- 같은 버전으로 재배포 가능하고 덮어씀
- Disable redeploy
- 같은 버전으로 다시 배포 할 수 없음
- Read-only
- 아예 배포가 허용되지 않음
- Deploy by Replication Only
- 레플리카를 사용하는 경우 레플리카로만 배포되고 다른 배포는 차단됨
- Allow redeploy
자세한 내용은 여기서 확인 할 수 있다.
3. Repository access 유저 생성
Role 생성
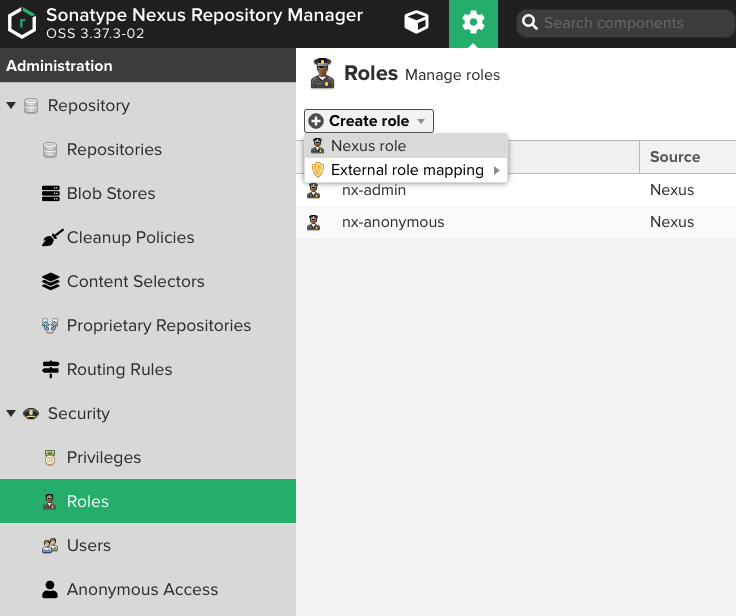
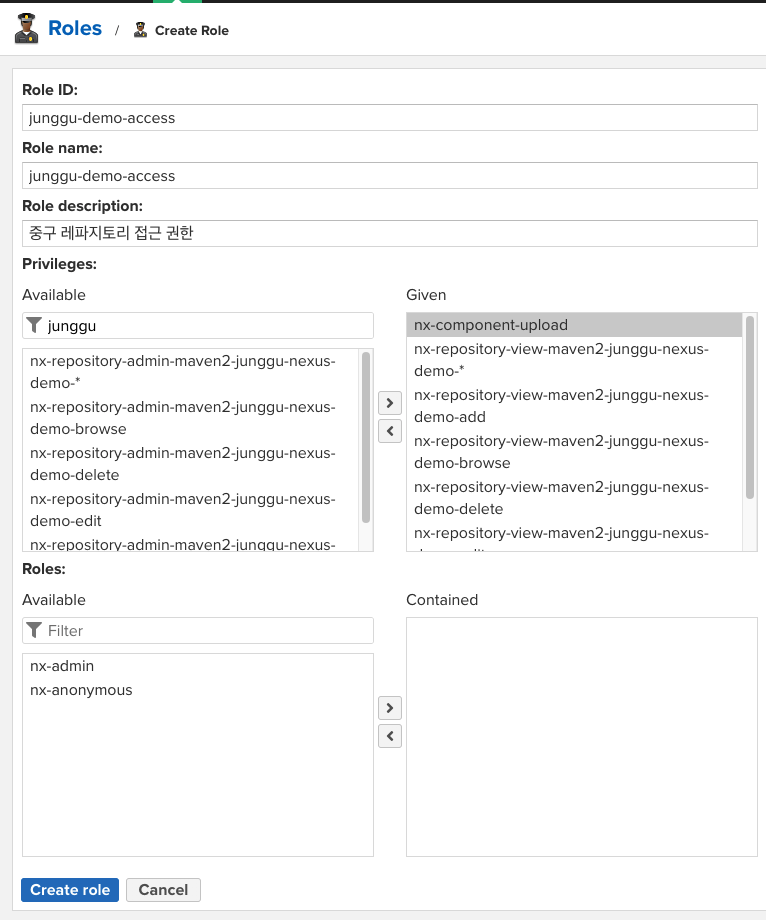
필터란에 생성한 레파지토리명으로 검색해서 nx-repository-view-… 로 시작하는 권한들을 넣어주고, 해당 Role로 레파지토리에 업로드도 할 수 있게 하기 위해 nx-component-upload 권한도 넣어준다.
유저 생성
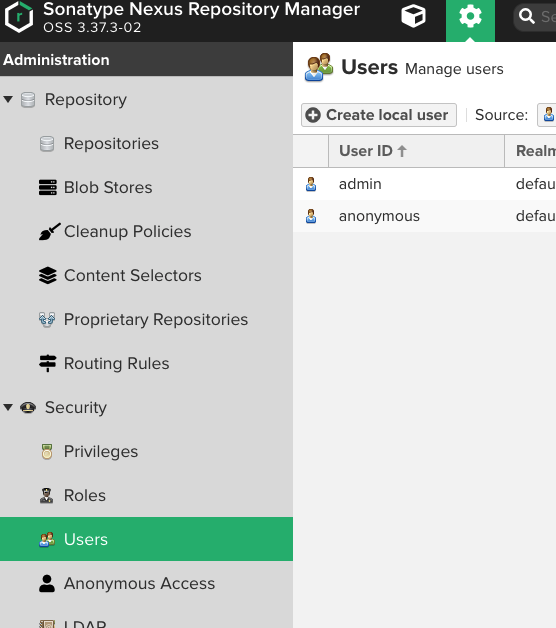
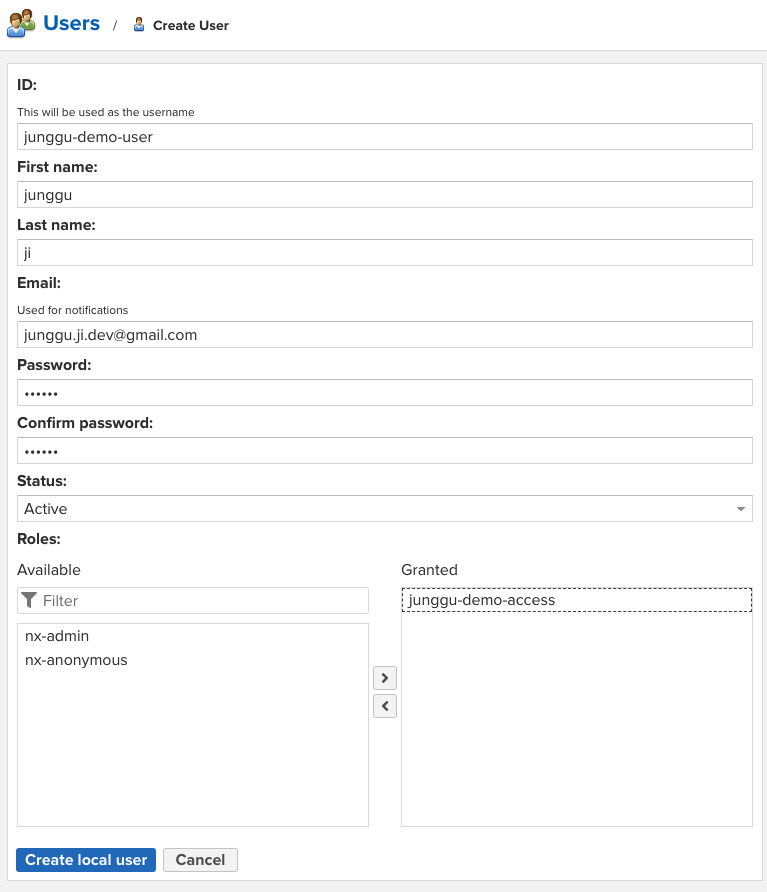
- 각 항목들은 각자에 맞게 넣어주고 Role엔 조금 전에 생성한 Role을 넣어주고 생성을 완료하면 우리가 처음에 로그인한 어드민 계정과는 달리 우리가 생성한 repository만 접근 할 수 있는 것을 확인 할 수 있다.
4. 라이브러리 업로드
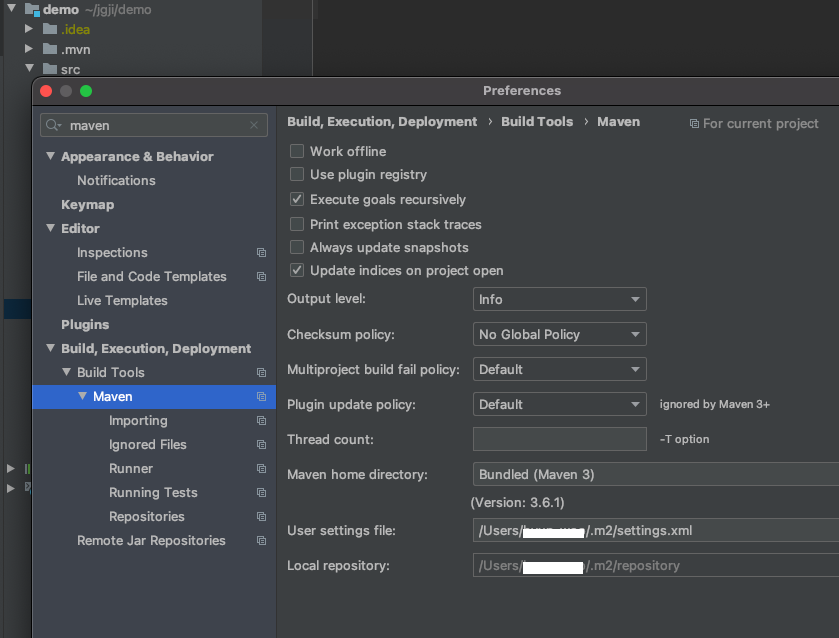
settings.xml 설정
nexus 레파지토리에 접근하기 위해서는 우선, maven 설정 파일인 settings.xml을 수정해야야 한다. 기본적으로는 ~/.m2/settings.xml 으로 설정되어 있으므로 이 곳에 생성해서 사용하거나, 이미 settings.xml을 사용하고 있다면 그 파일을 수정해주면 되는데.. 이도 저도 모르겠으면 아래 이미지 처럼 인텔리제이에서 확인하여 그 위치의 settings.xml을 수정해준다.
1 | <settings xmlns="http://maven.apache.org/SETTINGS/1.0.0" |
- id : 레파지토리 서버의 ID (자유롭게 지정)
- username : 레파지토리 접근을 위해 생성했던 nexus access 계정 Id
- password: 레파지토리 접근을 위해 생성했던 nexus access 계정 password
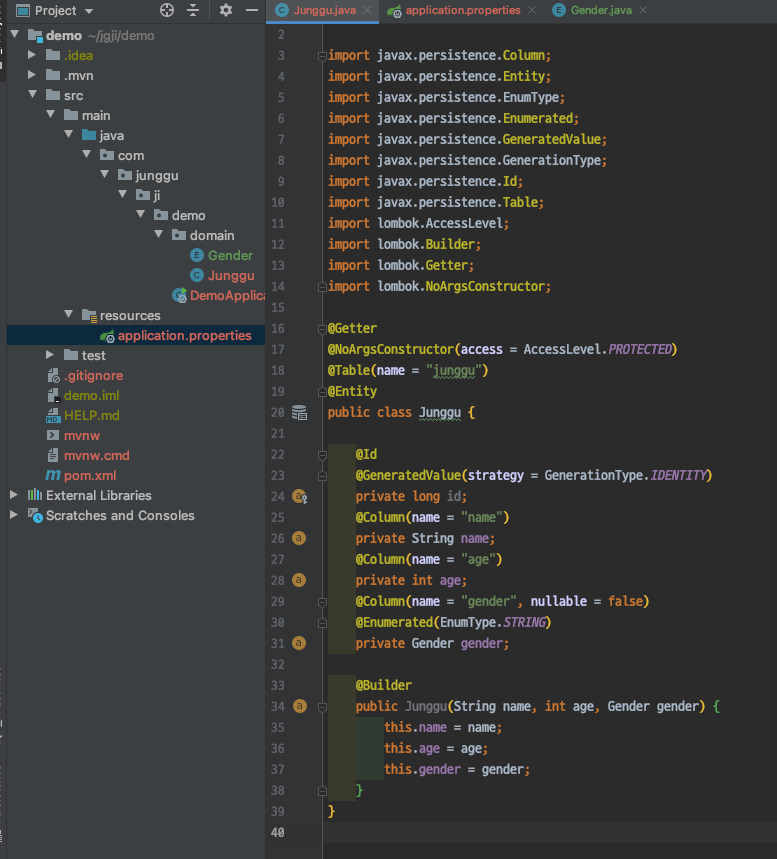
코드 작성
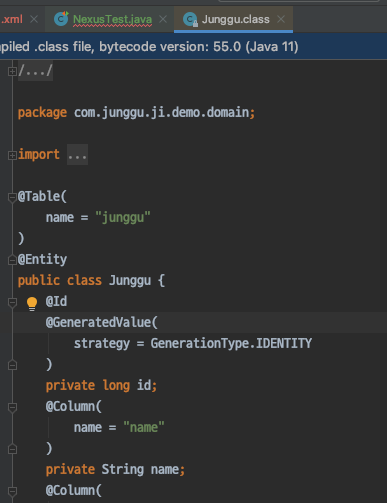
모듈화할 코드를 작성하면 되는데, 우리는 도메인 영역을 모듈화 할 것이므로 Entity 클래스를 생성해서 테스트 해본다.
POM.xml 설정
코드 작성을 완료했으면 이제 해당 프로젝트를 nexus repository에 업로드 하기 위해 pom.xml에 아래 처럼 설정을 추가해줘야한다.
1 | <distributionManagement> |
- id : settings.xml에서 설정했던 id와 동일해야함.
- name : 사람이 식별 할 수 있게 설정.
- url : 생성한 repository의 url
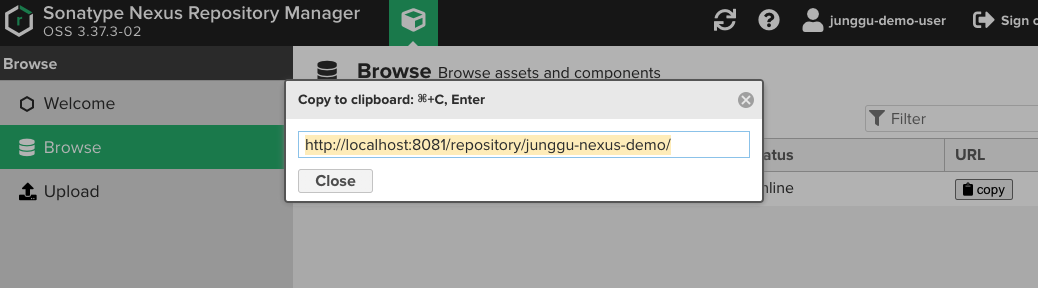
- <distributionManagement> 와 <repository>대한 자세한 설명은 이 쪽으로
배포하기
1 | mvn clean compile deploy |
- 위 명령어로 deploy 하거나 혹은 Intellij에서 deploy를 실행시켜도 된다.
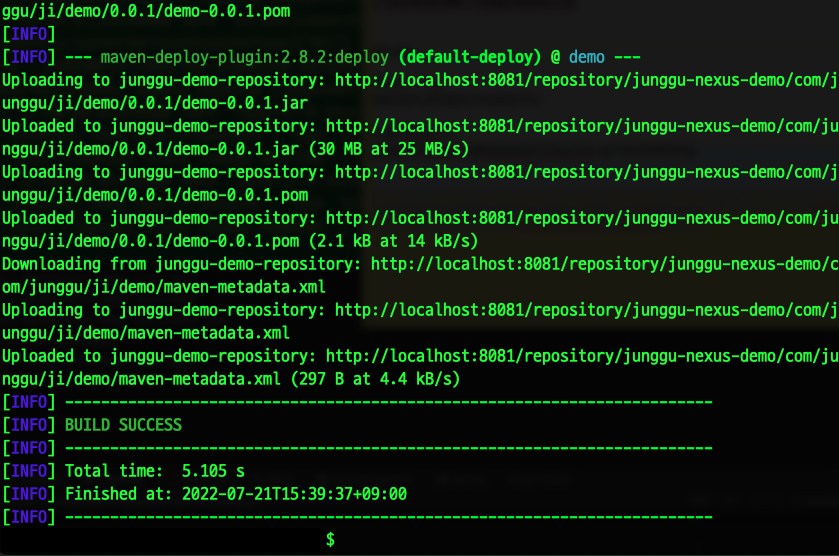
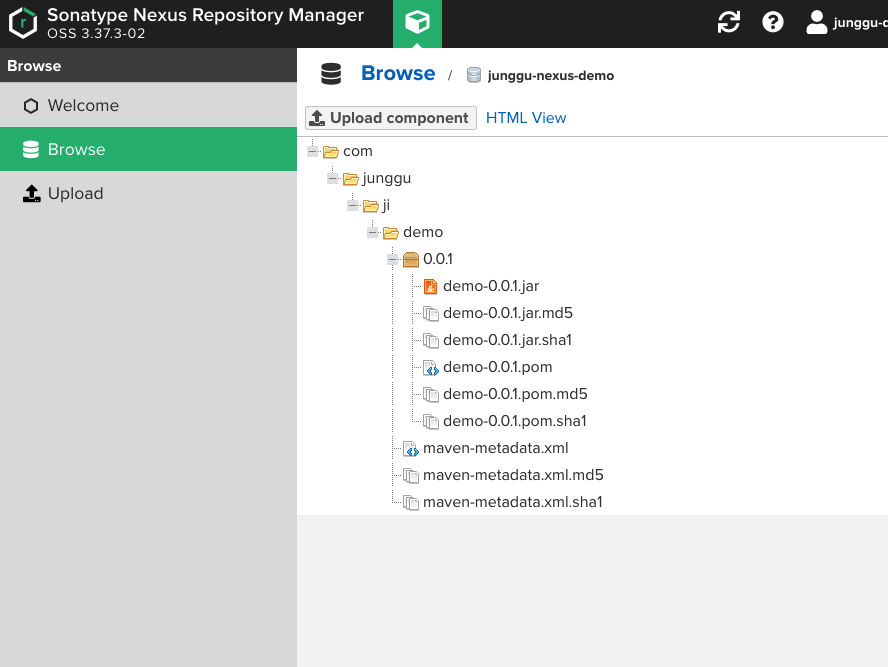
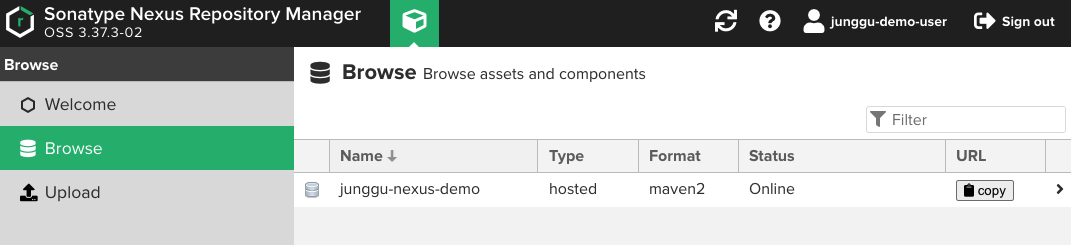
- 무사히 deploy가 성공했다면 nexus에서 jar 파일이 정상적으로 업로드된 것을 확인 할 수 있고, 이 후엔 이 라이브러리화된 jar파일을 다른 프로젝트들에서 dependency에 추가해서 사용하면 된다.
업로드된 라이브러리 사용하기
업로드된 라이브러리를 사용하기 위해서 사용하고자 하는 프로젝트의 pom.xml에 아래와 같은 설정을 추가해준다.
1 | ... |
- 우선 라이브러리가 업로드된 nexus repository의 정보를 입력하고
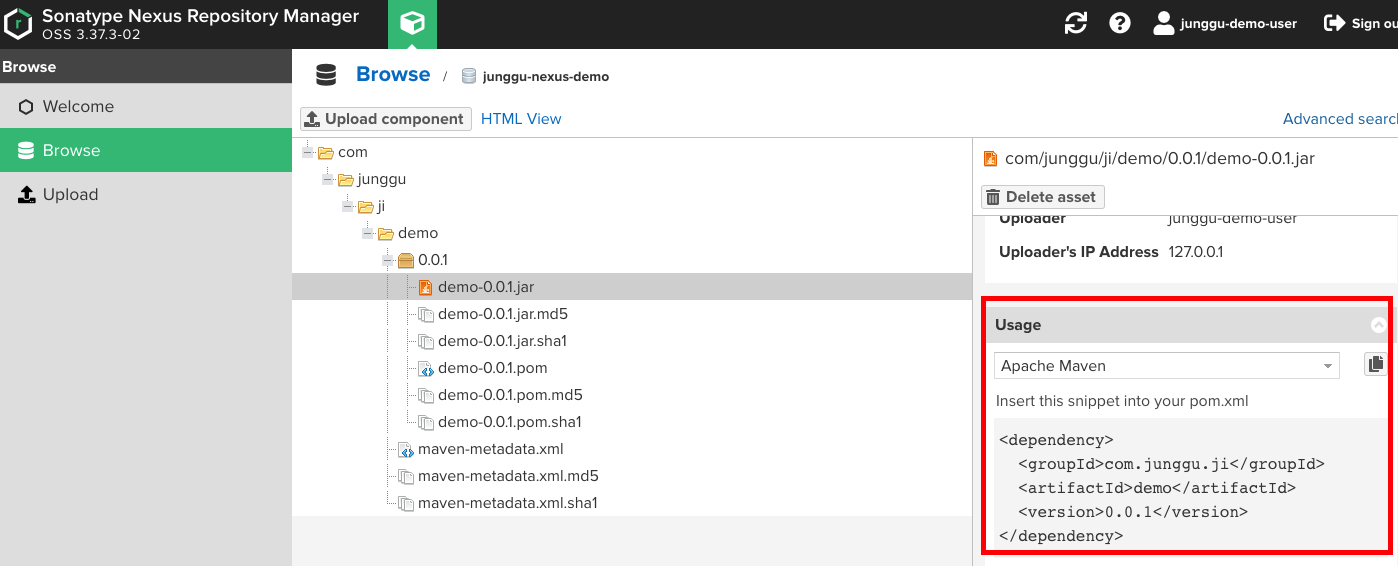
- 우리가 업로드한 라이브러리 정보도 dependency에 추가해준다.
- 이 때, dependency의 속성들이 헷갈린다면, nexus에서 업로드된 jar를 선택 할 경우 아래 이미지처럼 친절하게 알려주므로 복사해서 사용하면 된다.
Entity 호출하기
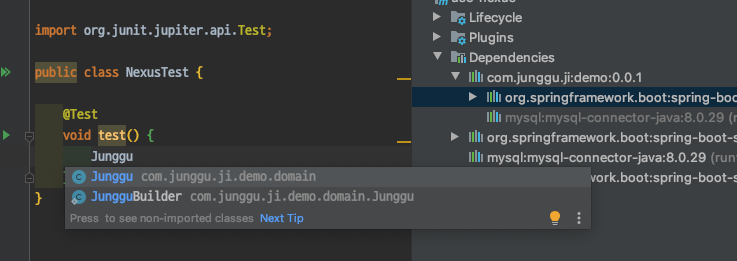
- 위 이미지 처럼 dependency 추가 후 maven을 새로고침하면 보이는 것 처럼 추가도 잘 되고 코드에서도 사용 할 수 있는 것 처럼 보이는데 막상 코드에서 사용하려고 하면 아래 이미지에서 보는 것 처럼 정상적으로 호출되지 않는 것을 알 수 있다.
- 결론부터 이야기하면 우리가 jar로 만든 프로젝트는 Spring boot 프로젝트를 그대로 jar로 패키징 한 것으로, 일반적인 jar 파일이 아닌 Spring boot가 실행 가능한 jar 형태로 패키징 되었기 때문에, jar에 포함된 클래스들을 호출 할 수가 없는 것이다.
- 여기서 말하는 실행 가능한 jar는 META-INF에 저장된 MANIFEST.MF에 저장된 정보를 읽어서 실행시키기 때문에 우리가 일반적으로 호출하는 형태로는 사용 할 수 없다.

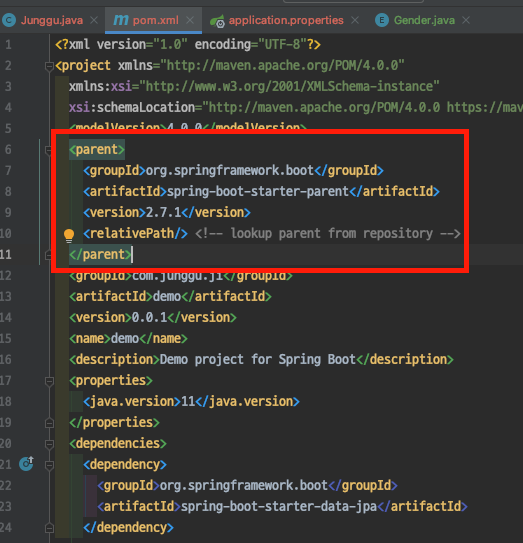
이 실행 가능한 jar를 일반적인 jar로 만들어서 repository에 배포하기 위해서 모듈화하는 프로젝트의 pom.xml에서 아래 설정을 제거 해주고 다른 dependency들에게 각각 version을 지정한 후 maven compiler plugin도 알맞게 추가해주면 되는데
이 때 우리가 삭제한 spring-boot-parent에 포함된 의존성들은 여기서 확인 할 수 있으므로, 필요한 것이나 각각 dependency들을 무슨 버전으로 지정해야 할 지 모르겠다면 여기서 확인 후 추가해주면 된다.
1 | <plugins> |
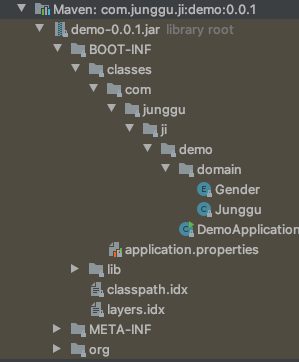
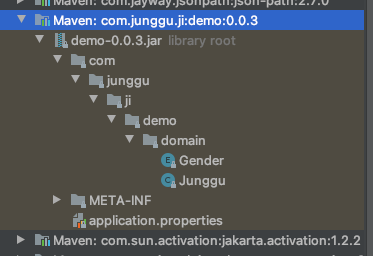
- 이제 verison을 올린 후 새로고침 해보면 이전과 다르게 BOOT-INF가 없어지고 바로 com. 으로 시작하는 자바 패키지가 노출되는 것을 확인 할 수 있다.
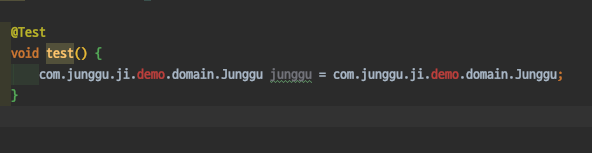
이제 테스트 코드를 작성해서 돌려보면 테스트가 성공 할 줄 알았으나.. 애석하게도 아래와 같이 Not a managed type 라는 에러를 내뿜으며 우리의 기대를 무참히 박살내는데…
1 | Caused by: java.lang.IllegalArgumentException: Not a managed type: class com.junggu.ji.demo.domain.Junggu |
이는 우리가 추가한 라이브러리의 Entithy가 component scan에 인식되지 않아서 Bean context에 등록되지 않았기 때문에 발생하는 에러이다.
왜냐면, spring boot는 기본적으로 @SpringBootApplication안에 있는 @EnableAutoConfiguration으로 스프링이 정의한 외부 의존성들과 @ComponentScan으로 해당 어노테이션 하위 패키지에 있는 클래스들을 탐색해서 Bean으로 등록하는데,
우리가 추가한 라이브러리는 둘 중 어느 위치에도 존재하지 않으므로 당연히 Bean에 등록 될 수없는 것이다.
라이브러리안에 있는 Entity Bean context 등록하기
여러 방법이 있겠지만, 필자는 SessionFactory Bean을 따로 만들어서 우리가 만든 Entity가 있는 라이브러리의 패키지까지 스캔 하도록 추가하는 방식을 사용하였다.
1 |
|
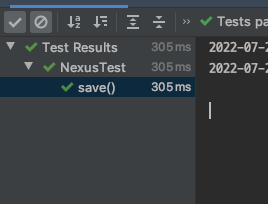
적당히 작성한 테스트 코드와 성공한 모습
1 |
|
결론
이렇게 우리는 여러 프로젝트에서 공통으로 사용되는 부분을 따로 빼서 모듈화 하는 방법을 알아보았다.
필자는 단순히 Entity 클래스의 관리를 편하게 하기 위해 이번 모듈화를 진행했지만, 레이어 별로 프레젠테이션 레이어, 서비스 레이어, 도메인 레이어등으로 구분하여 모듈을 구분 할 수도 있을 것 이다.
다만, 이렇게 멀티 프로젝트에 nexus를 이용해서 모듈화를 구현하는 경우, 모듈화한 프로젝트를 수정 했을 때 모듈화된 라이브러리를 사용하는 다른 프로젝트 모든 프로젝트에서도 손수 version을 올려줘야한다는 단점이 있기 때문에(물론 Deployment policy를 Allow redeploy로 설정했다면 상관없다.), 각자의 서비스에서 단일 프로젝트 멀티 모듈 구조가 맞을 지 아니면 필자처럼 멀티 프로젝트인 상태로 모듈화를 구성 할지는 잘 판단해서 구조화를 해야 할 것 이다.
P.S
여담으로.. 필자는 이번 모듈화를 진행하면서 DTO에 의존적인 Entity들에 대해 굉장히 많이 리팩토링을 진행 할 수 있었고, 레이어 별 분리에 대해 다시 한번 생각해보는 계기가 되어서 고생은 좀 많이 했지만, 개인적으로 굉장히 뜻 깊은 시간을 보낼 수 있었다.
참고 사이트
- Nexus3 설치 및 리포지토리 생성 하기
- Nexus에 Spring Maven 라이브러리 배포 및 사용하기
- 5분 안에 구축하는 Nexus
- https://peaku.co/questions/39613-spring-boot:-mapeo-de-entidades-desde-un-contenedor-externo
- https://stackoverflow.com/questions/48416927/spring-boot-required-a-bean-named-entitymanagerfactory-that-could-not-be-foun
- https://stackoverflow.com/questions/43705720/how-do-i-import-configuration-classes-in-a-datajpatest-in-a-springboottest


